AWS IoT EduKit is what? What can we learn from it?
In this entry, I will introduce the AWS IoT EduKit, a new reference device from AWS that was launched by AWS re:Invent 2020, and what we can learn from this kit.
> This article is an English translation of a Japanese article.
AWS IoT EduKit is … ?
AWS IoT EduKit is a device that helps you learn about the integration of microcontroller (“MCU”) and AWS IoT Core (“IoT Core”).
It looks cute in orange.

AWS IoT EduKit (“EduKit”) is an M5Stack Core 2 included Microchip’s ATECC608A Trust&GO secure element.
The ATECC608A Trust&GO secure element is mounted in the U4 position on the Bottom component of M5Stack.

The datasheet and schematic can be found on the M5Stack page. It is also available in Amazon.com, and the online tutorial is also available.
It includes the standard Blinky, an example of an air conditioning control implementation, automatic air conditioning management with Amazon SageMaker(a machine learning service), as well as control from Alexa Voice Service Integration for AWS IoT, allowing IoT learning with AWS.
EduKit’s code are written in FreeRTOS, so you can learn it as an example of FreeRTOS implementation. It is also a great way to learn how to make small and power-efficient Alexa devices in terms of being able to implement Alexa functions in a MCU.
However, these examples can be made with IoT Core + Raspberry Pi (and it’s easy).
Why do we use EduKit?
Solutions
EduKit is a kit for hardware developers to learn how to work with IoT Core using secure elements with client certificates.
Using a secure element with a client certificate has 2 benefits.
- Eliminates the need to create client certificates and operate CA for IoT core connectivity
- Eliminates the need for measures to prevent leakage of the private key
This benefits can be learned through the following 2 points in EduKit.
- How to register to IoT Core with the client certificate in ATECC608A Trust&GO
- How to use the private key in the ATECC608A Trust&GO when connecting to IoT Core
BTW, this mechanism is established by the following 2 methods.
- Microchip’s provisioned secure element solution “Trust Platform”
- IoT Core’s “Register a client certificate without a registered CA”
Benefit 1;
Eliminates the need to create client certificates and operate CA for IoT core connectivity
Authentication is required to connect to IoT Core.
There are several methods of authentication, among which the method using X.509 client certificates requires 2 things: a client certificate and a pair of private keys.
There are 4 ways to create/prepare this pair.
- Create on IoT Core’s CA
- Created using CSR (Certificate Signing Request)
- Create your own client certificates
- Register a client certificate without a registered CA
1/ Create on IoT Core’s CA;
Can be created in IoT Core management screen. This is the easiest way, but you need to transfer the obtained private key and client certificate to the device.
2/ Created using CSR;
You can use your own private key. Create a CSR from the private key and request IoT Core to sign it to get a client certificate. The client certificate needs to be transferred to the device. (I cannot found in the document 😭)
3/ Create your own client certificates;
You can use your own private key and client certificate. Although it is suitable for managing many devices, it is necessary to register your own CA to IoT Core as an initial setup and to operate your own CA correctly. In addition, it is necessary to register a client certificate for each device to IoT Core before connecting the device. It reduces the time and effort required to register client certificates in a just-in-time feature.
4/ Register a client certificate without a registered CA;
You can use your own private key and client certificate. The CA that signs the client certificate does not need to be registered in IoT Core. It is necessary to register the client certificate with IoT Core before connecting the device.
2/3/4 are a mechanism that assumes that you have a private key or a pair of client certificate. This can be created with the openssl command.
On the other hand, ATECC608A Trust&GO is shipped “provisioned”. i.e., with the private key and client certificate already stored in it, so there is no need to create a private key and/or client certificate. This is “Trust Platform” (called by Microchip)
BTW, In general, secure elements do not contain client certificates, so they must be created using commands in the secure element ( similar to the openssl command). The Trust Platform provides a solution to this problem.
If you check the signer of the client certificate extracted from ATECC608A Trust&GO, you will see that it is Microchip Technology Inc. (Extraction and signer confirmation are introduced in the latter half of this article.)
Until now, client certificates of signers who are not registered as CA with IoT Core could not be used for registration, but with “Register a client certificate without a registered CA”, client certificates signed by Microchip CAs that are not registered as CA with IoT Core can now be registered with IoT Core.
Benefit 2;
Eliminates the need for measures to prevent leakage of the private key
The benefit described so far can also be achieved by distributing a microSD that stored the client certificate and private key. The reason for using the secure element here is that it eliminates the need for measures to prevent leakage of the private key.
In order to connect to IoT Core, 4 pieces of information are required: client certificate, private key, server certificate for TLS, and endpoint address of IoT Core. Of these, all but the private key are information that can be leaked. Therefore, the confidential information is the “private key”.
It is a security risk to keep the private key in an easily readable storage device such as microSD. For this reason, we take leakage protection measures such as encryption of the file system. It’s heavy and moreover not money.
The private keys in the ATECC608A Trust&GO are protected by the Secure Element feature, eliminating the need for troublesome leakage countermeasures.
What is feature of secure element?
A secure element is a hardware module that integrates storage for securely storing information and a co-processor that can execute logic to assist in encryption and random number generation. It is connected to and accessed (read/write/execute) from the host CPU/MCU using I2C or other methods.
It is designed in such a way that internal information can be accessed using only specified procedures, and access using other procedures or circuit analysis is difficult (it will be call as highly tamper-resistant). It is extremely difficult to duplicate and is used as an element to guarantee trust (Root of Trust (RoT)).
Examples are the IC chip part of a credit card, a mobile wallet (NFC), and the SIM used in smartphone communication, which is also a secure element.
Focus 1;
How to register to IoT Core with the client certificate in ATECC608A Trust&GO
The first part is extracting the client certificate from the ATECC608A Trust&GO and registering it to IoT Core. This part is not handled by M5Stack Core2, but by Python running on the development PC.
Specifically, the registration_helper.py file. The contents are here.
- Extract the client certificate from the secure element (here)
- Register with IoT Core using register_certificate_without_ca API (here)
Once you have extracted the client certificate from ATECC608A Trust&GO, you can do the same using the above API by running the AWS CLI. The client certificate can be retrieved directly using the “shell” described below too.
** registration_helper.py creates Manifest.json in the process. This is not so much for EduKit, but it is important for mass production using ATECC608A Trust&GO. It is very hard to extract the client certificate from the device during mass production. When you purchase the ATECC608A Trust&GO in parts, you can get Manifest.json which contains the client certificate. This file can be used for batch registration to IoT Core.
# Shell for ATECC608A Trust&GO on EduKit
I made a shell for ATECC608A Trust&GO based on registration_helper.py (ATECC608A_shell.py). You can run it ready with EduKit development environment.
$ cd Core2-for-AWS-IoT-EduKit/Blinky-Hello-World/
$ curl -O https://gist.githubusercontent.com/ma2shita/37f5b68f4a7e1829220a7702ac082ae4/raw/12bba55527b3d5b2c1e3b7ce04eb605e0caabb36/ATECC608A_shell.py
$ source ~/esp/esp-idf/export.sh
$ PYTHONSTARTUP=ATECC608A_shell.py python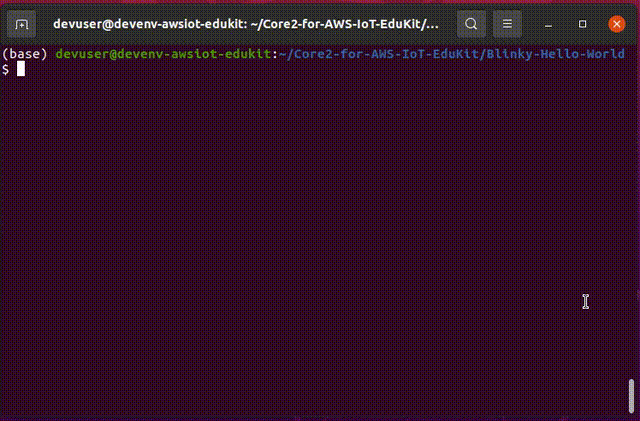
The extracted client certificate can be verified with the openssl command and can (of course) be used to register with IoT Core.
$ openssl x509 -issuer -noout -in fetched_client.crt.pem
issuer=O = Microchip Technology Inc, CN = Crypto Authentication Signer 2A00
Focus 2;
How to use the private key in the ATECC608A Trust&GO when connecting to IoT Core
Once you have registered the client certificate to IoT Core, you are ready to connect. Let’s take a look at the actual FreeRTOS code that connects from EduKit.
EduKit to IoT Core connection code are #if defined(CONFIG_AWS_IOT_USE_HARDWARE_SECURE_ELEMENT). You can find by grep the sample code with CONFIG_AWS_IOT_USE_HARDWARE_SECURE_ELEMENT.
The points of interest are atca_mbedtls_pk_init() on line 204 and mbedtls_pk_parse_key() on line 218 of network_mbedtls_wrapper.c. Here, the private key in ATECC608A Trust&GO is used to extract the information necessary for TLS client authentication.
BTW, If you look before and after CONFIG_AWS_IOT_USE_HARDWARE_SECURE_ELEMENT, you will see that it is designed to work with a client certificate and private key created separately without using ATECC608A Trust&GO. In other words, except for the client certificate and private key part, the standard implementation of a TLS connection using mbed TLS is sufficient.
Conclusion
AWS IoT EduKiT is a kit to make hardware developers feel that it is good to use secure elements.
Don’t worry if you can’t get it to work with AWS IoT Events and/or Alexa. It’s easier and more interesting to do it with a Raspberry Pi or something. 😅
As for the ATECC608A Trust&GO, the communication with the MCU is I2C, which seems to be easy to implement, and the MOQ (minimum order unit) is 10, which means that it can be started on a small scale.
However, the process of registering the client certificate is done from the PC.
If you want the device to register itself, you have to use your own CA for just-in-time registration at the moment. I would like to see a solution that allows direct registration with the client certificate in the secure element!
BTW, Soracom provides a service of provisioning for device
Soracom is IoT Cellular Connectivity/Platform Provider. We provide SIMs for IoT and platform services that make IoT development easier.
“SORACOM Krypton” provides on-demand provisioning of credentials and connection destinations based on SIM authentication, streamlining design and manufacture, increasing flexibility, and saving both time and cost.
Its service uses a SIM(SIM is secure element too)to create and get X.509 certificates for IoT Core on your behalf, as well as STS through Amazon Cognito.
See here for more details if you have a interest for provisioning.
Postscript
My English is not good. DeepL helped me.
If you find incorrect, tell me please (softly).
― Kohei “Max” MATSUSHITA / @ma2shita
